Showing posts with label paint. Show all posts

Monday, November 7, 2011

Entry re-do. Or really just "Entry Do."

Since we moved into our house a year ago, I've been wanting to do something with our entryway. You know, like make it look like an actual entryway and not just a short hallway with a door at the end? Plan A was to do board and batten, but I couldn't get away with just doing the batten and painting it white since our walls are textured and that would just look weird. Plan B was beadboard, which I still might do someday, but I wanted something cheaper and easier for now.

A couple weeks ago The Lovely Neighbor Jan and I went to Urban Salvage in downtown Fresno, which is by the way, my new favorite place, and along with a few other things, some of which I have no idea what I'm going to do with, I picked up two sets of shutters. I've been looking for old (cheap) shutters for a year. These, were $2 a pair. SCORE! After bringing them home, I decided that I finally knew what I wanted to do with the entry. Turns out, that one pair of shutters matched the height of an old window I had sitting in a closet. The window used to be in our guest bathroom, but I'd replaced it with something else a little while ago. I painted the window a cream color with some $2 ReStore paint from my paint stash, and then used a dark walnut glaze over it to age it a little bit. The bottom pane used to be a mirror, and the top was just a regular window, but I wanted something a little more functional for an entry so I put the mirror on top, and painted the bottom glass with chalkboard paint. I'd planned on not doing anything with the shutters, but after I got them up, they just didn't look right, so I dry brushed them with some of the leftover grey/blue paint from our bedroom.


The coat hooks I made out of some scrap wood I had in the garage that had come off of a pallet I'd found in a dumpster. In the process of making these I learned how to put in a new blade on a circular saw, and how to use a circular saw. I am woman, hear me roar. Again, I painted them with ReStore paint from my stash. The actual coat hooks I picked up from Lowes for $4 a piece. They're in the doorknob aisle, in case you're ever looking for them. Took me about 20 minutes to figure that one out. Fun fact: The hooks in the bathroom aisle cost 3 times as much as the hooks in the doorknob aisle. (Ok, not fun fact. Just an irritating fact.)


I saw a picture somewhere on Pretty Handy Girl's blog of some similar coat hooks that she'd made and adapted it to what would work for us. Her version had a lot more scrap pieces of wood put together with several hooks. I wanted ours to frame the window, and also have some hooks low enough for the kids to reach by themselves, so I made four individual coat hooks.


The garland came from my bookshelf. I think I've finally found a permanent home for that thing. At least until I decorate for Christmas...


The "Family" thing I found on Pinterest. Well, sort of. They used yarn, I used twine, 'cause I just love twine.


I wish I had a before picture of the entry, but really, there was nothing, so just close your eyes and pretend like the inside of your eyelids are a light grey/blue color, and you'll get the idea.

Thursday, July 21, 2011

New Fruit Bowl


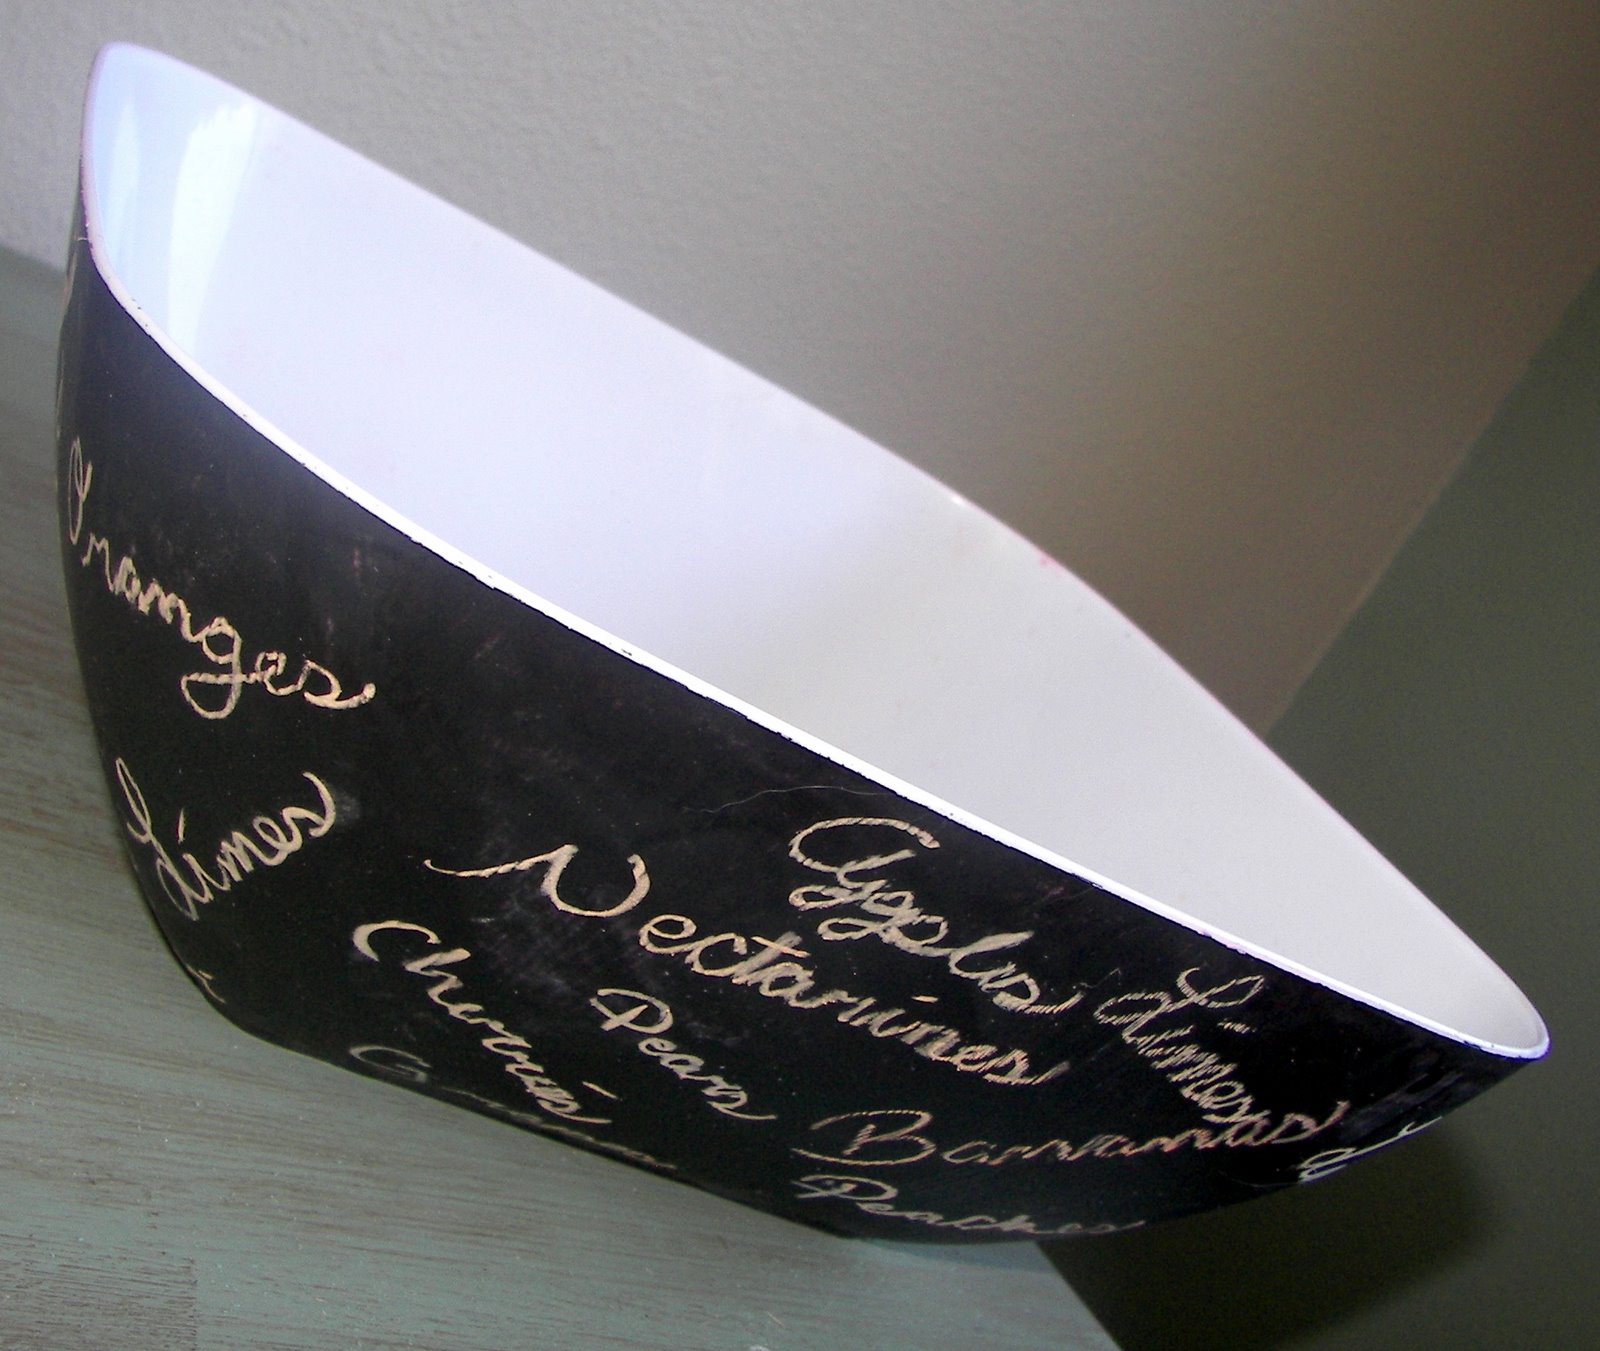
I live a block away from a Target. Problem with living a block away from a Target is that anytime you need a little something, you can just walk (or drive, who are we kidding) over to Target to pick up whatever you need, and of course a little extra, because it's Target. A week ago I needed to get diapers for a baby, or pickles, or maybe it was a light bulb, who knows, but whatever it was, instead of going straight to the light bulb aisle, I had to go check out the "value section," 'cause I'm all about the values. There, sitting up on the top shelf, was this bowl. Well, not JUST this bowl, there were several of them, but this bowl was lucky enough to get to come home with me and get a makeover. Upon arriving to it's new home, it got a couple coats of chalkboard paint on it, and someday, will get some fruit in it. (Why am I getting flashbacks to lessons about prepositions?) After I talk myself into going to the grocery store, or the farmers market, or somewhere that has fruit, we'll actually get to that last step, but for the moment, all of the fruit is in the freezer, and it would probably get pretty messy if I took all that out to put in my new bowl. First of all, because it's a heck of a lot of fruit, and also, because frozen fruit is always messy when it's thawed out, which is why I make smoothies out of it, and don't ever actually thaw it out. Since this post was supposed to be about my new fruit bowl, and not about my fruit thawing habits, I think it's time for me to stop typing. It's also time to stop typing because my two-year-old is eyeing my big glass of iced coffee, and that would be bad if he decided to partake.

Monday, July 18, 2011

Chalk boards, cupboard doors, same thing


Today I have a before and after, but only because I managed to find a "before" picture from awhile ago. It's not like I was patient enough to take a picture of the "before" so you really just got lucky on this one.


The point of this picture, is the big empty space on the far wall. I'm not a fan of empty spaces, but that's not the problem. See that shiny rectangle on the left side of the wall? That's a phone jack. The phone jack that wouldn't be a problem if I could put a phone there. You know, if there were a power outlet anywhere remotely close to the phone jack that I could plug said phone in to. I'm telling you, I'm not sure the designers of this house were all there. After oh, 5 months of living here, I came up with a solution. Something had to cover it up, and also lie flat against the wall so that you wouldn't know that something was being covered up and, whatever was put there, would have to span most of the wall since it's not like it would look normal to just put something over the phone jack. If I did that, someone would probably think, "hey, I wonder what that picture is covering up, and try to look under it or something. Here is my solution-


I headed over to the Habitat ReStore and picked up some cupboard doors, put some chalkboard paint on them, drilled some holes to put some twine through, and hung those suckers up. Noah loves to color on them, so he gets to have his pictures hung up in the dining room.


See, no more phone jack! (Or empty wall.)

Thursday, July 14, 2011

Magazine rack, done!


It's finally done! I thought this would be a quick project, and it probably would have been if I wouldn't have had other stuff going on...you know, like kids- and a husband. I did finish it though, and now it's ready for someone to take home and put somewhere. It can be shipped easily, so if anyone wants it, let me know, and I'll be glad to let you take it off of my hands. Can I just say how much I love the fence in our backyard? It's the perfect backround for the pictures of my furniture.


The magazine rack can be found for sale here at The Shabby Corner.

Friday, June 17, 2011

Before and After


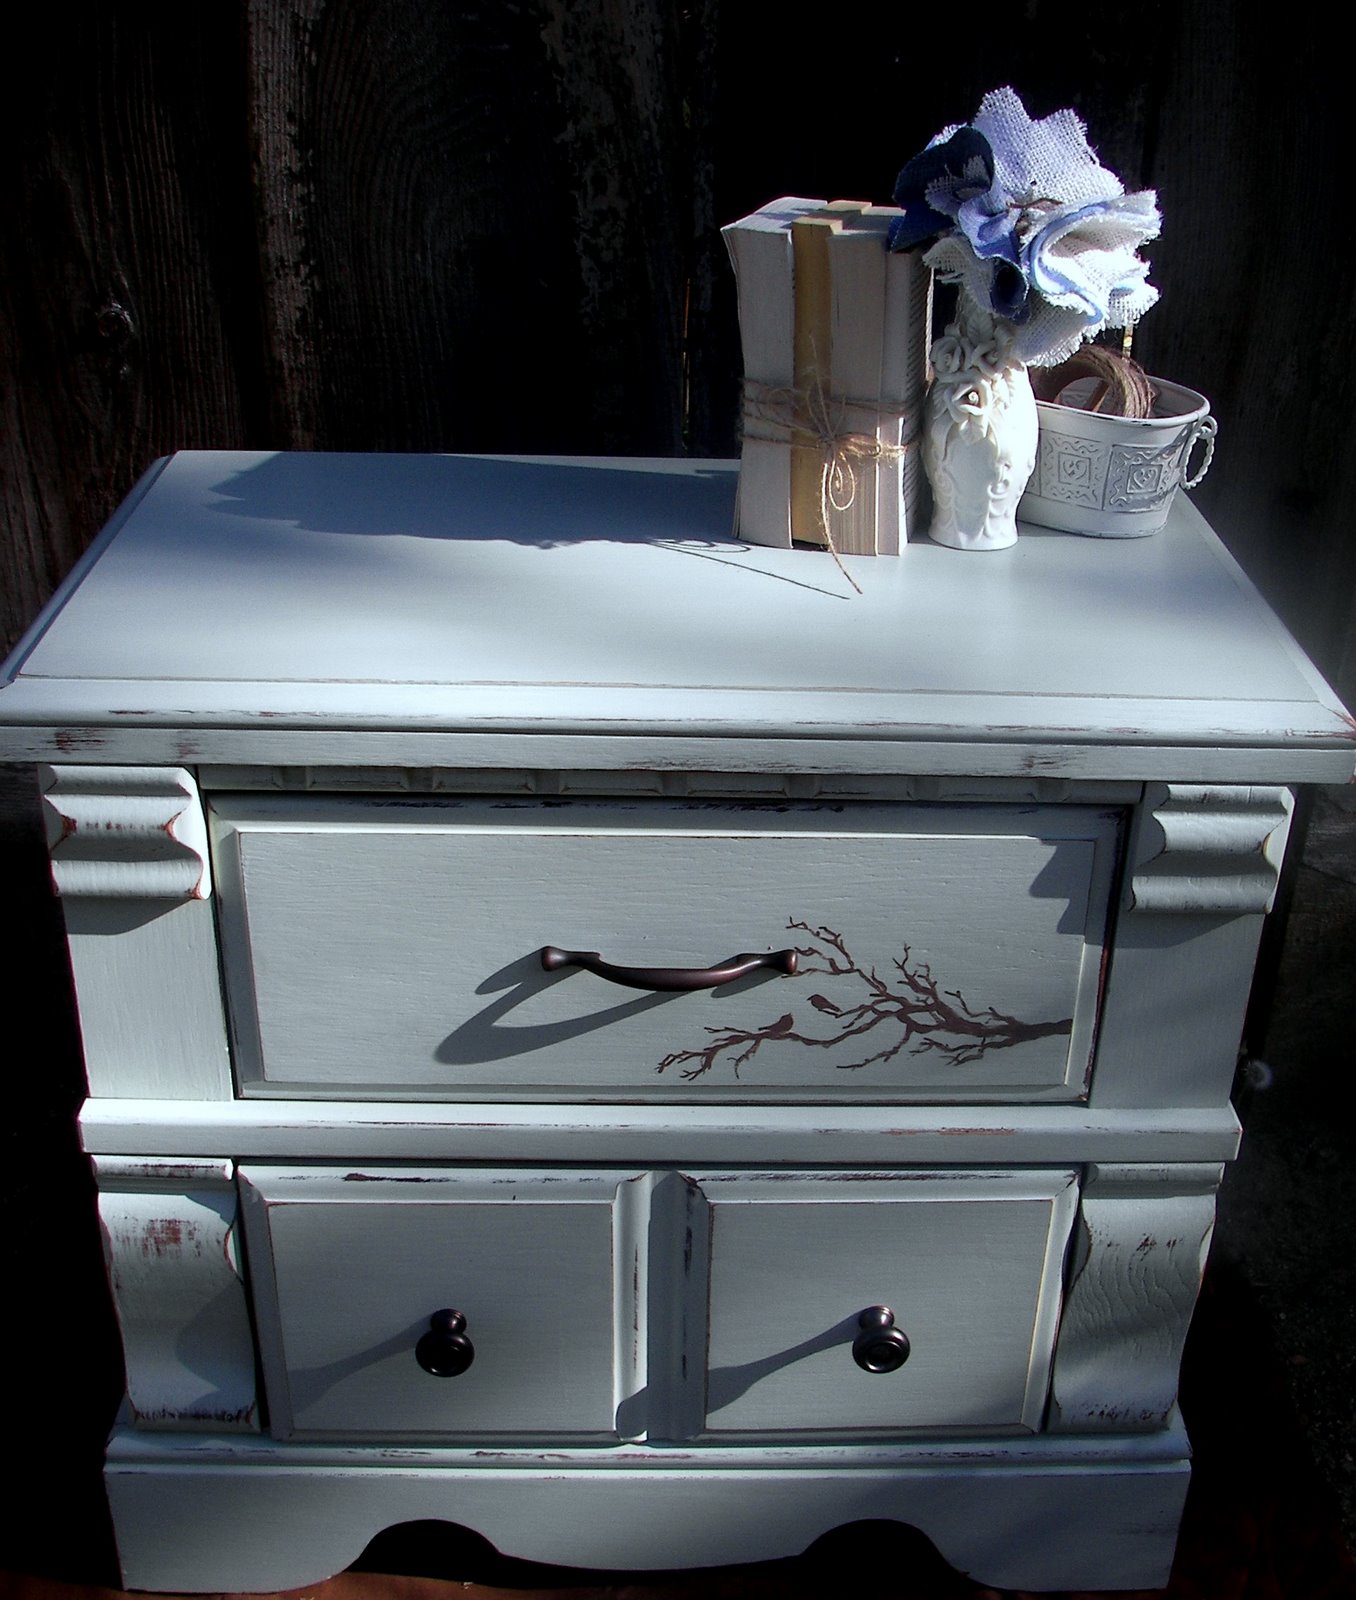
This is the end table I mentioned way back here. I really thought I would have it done before now. Guess I was wrong. Woops. Anyways, it's been painted, received a "something pretty," distressed, and polyurethaned. That's a word, right? Eh, probably not. Here's the after.


This end table/night stand is currently for sale here, and here. Let me know if you're interested!


Monday, June 6, 2011

A small before and after


This is a little metal tub thingy I found for a few cents at The Salvation Army that needed a little bit of a makeover. I liked it as it was, or really, as they were, since there were 3 of them, but as usual, I thought they could be better. Enter Rustolium's Heirloom White spray paint.


Better, right? Still not done though. Distressing makes everything better.


NOW it's all done. Slightly distressed to bring out the details, and give it a little personality.


Saturday, April 30, 2011

Goodbye 1978!


Meet my bathroom vanity. (Sorry about the shooting pain you're getting in your eyeball from seeing this graphic picture.) I don't even know where to start. It looks like at some point a previous owner tried to refinish them by staining them....only instead of brushing or wiping on the stain like a normal person, they just kinda threw it. Possibly with a spoon. It gets worse. As I was cleaning them I found grooves in the cabinet doors that I didn't know were there. Why? Because they were filled with goo. Not normal goo like Spackle, or caulking, goo like....like the goo you find in the back of your refrigerator. The drawer pulls....oh boy. Hello, 1970! Oh, and there was some sort of green "fun" stuck in them. The hinges...I'm not sure they qualify as hinges anymore.

I decided it was time to do something about this. The only reason I hadn't done anything about it before now was because I didn't know what color I wanted, and I sure don't want to re-paint them any more than I need to. It's a pain to paint cabinets. The day I decided, I went to get my paint, and the next day started painting.


Meet my new vanity. It's SO much better. No more stain spatters, no more goo, and no more 30-year-old drawer pulls with green fun. I love it. My mom had given me the drawer pulls and handles leftover from her kitchen remodel, so I didn't have to pay for those. I even have enough left over for our master bath. Score!

I decided to use handles on the drawers instead of the pulls like were on originally, so I had to patch the hole in the center of the drawer, and then drill new holes for the handles. I learned through that that you need to drill the holes BIGGER than the screws, and also that if the screws are too long and you try to screw them in farther than they're supposed to go, they'll start trying to come out the other side of the handles, and that's bad. (Thankfully I caught that before too much damage was done.) But hey, now I have the 1.25" screws that I need for the other bathroom, 'cause I'm willing to bet the the drawers are the same thickness in the master bathroom as they are in this one.

Someday I'd like to get new counters and faucet, but that day is a long way away.

In my next post, I'll show you all what I did to fix the uh...beauty mark in the mirror for only $12!


Thursday, April 28, 2011

A Boring Bench Made Pretty


Remember the bench that I mentioned here? Well, I finally got the thing finished. It's been sitting in our spare bedroom for a month or so, half done because I just haven't gotten around to finishing it. Partially because I wasn't quite sure what I wanted to do with it. I knew I wanted a "something pretty" on it, but didn't know what. A week or so ago, I decided, so then it was time to get her done.

This isn't a great "before picture," because well, it wasn't supposed to be a "before picture." It was meant to show our out-of-state family what our entryway looks like, but with the magic of the crop tool, it also works for a before picture of our bench.

The personality-less bench.

And now *drum roll please!*


All better. She (I can call it a "she" right?) is now full of personality.


My "something pretty."


Just had to put one in there of my little bench model. :)

She was painted with an "oops paint," the "something pretty" was done with paint I had left over from other projects, then glazed with an acrylic craft paint, sanded down with 60 grit sand paper, and once I get some, will be getting a coat of poly.

While doing this I decided that I really really like refinishing furniture. I like it to the point that's it's my preferred sanity saver when the kids are starting to make me feel a little nutty. So, I decided to open an etsy store and make a little bit of extra money by selling my pieces. I have an end table that I found on Craigslist yesterday waiting to be given a personality, so hopefully before too long, it'll be done and up for sale!


Friday, January 28, 2011

My latest project


Here at the Brahm home, there's almost always some type of project going on. This is for several reasons. Mostly because I have a hard time not doing anything, but also because for some reason I always think that something around here could be better, I like to work with my hands, learn how to do new things, and make things pretty. Not pretty as in girly-pretty, but pretty as in pleasing to look at.

My latest project, was my microwave stand. Shortly after moving into our house, I found a brand new microwave at Goodwill. We're not talkin' like new, but still has the styrofoam on it new. I really like it, but it's giant....and it was on my counter....shoved into a corner. Well, then my mom came out to stay with us for awhile when I had William, and she decided that this was just not going to work. She then set out to find me something to put it on besides my counter. After she checked Craig's List (yes, I take after my mom in the "being cheap" department), Walmart, and Target, I decided to take her to my favorite place to buy furniture- a local Fresno thrift store, 4 Sisters Thrift. They always have the coolest furniture in there. A lot of it is a little more than what I would pay for something, but not all of it, and they'll let me bargain with them. Anyways, after scouring the store, we found the perfect little table that was well under the budget for Operation Get Microwave Off Counter. Only problem was, the paint on the table was in pretty awful shape, and it was red and green. As much as I love Christmas, in my opinion, red and green should be Christmas, and only Christmas. So, I told my mom I was going to re-paint it. (She also bought me a entryway bench that will also be getting a make-over, but it just hasn't happened yet. That'll be a future blog post.)


This is the "before." I got a little impatient and had already taken the drawer out and painted it before I remembered to take a picture, so you'll just have to imagine there's a barn red drawer in there. Like I said, Christmas.


Like I said, paint was not in great shape. Fine if you want the paint-not-in-great-shape look, but that wasn't what I was going for this time.

I went at it with a wire brush to take off the loose paint, and almost all of it came off.

I put on a coat of primer, and then I decided to use the leftover paint from our dining room and living room since the stand would end up in the dining room, and be seen from the living room. (That part of the house is open.) Besides, I'm all about leftover paint.

See! My pretty grey/green antique-looking paint.

Then it was on to the drawer. I used a pretty cream colored paint that I found way marked down at Ace Hardward because it was a mis-tint. I had picked it up awhile ago because I knew I'd use it for something someday. After getting the cream colored paint on, I painted the branch and birds because I'm all about the details. It's an antique piece of furniture, so we can't have new-looking paint- that's would pretty much be the table equivalent of Joan Rivers, and we can't have that. So, it was on to putting on a glaze to make it look closer to its age. (I had already done that step in the picture. Impatient again. Woops.)

I ran out to the garage and grabbed a few bottles from my acrylic paint stash, mixed and then added water to thin it out.

Appetizing, right? When I was happy with my oh-so-appealing brown with just a tad of yellow, I brushed it onto my drawer and table, and then wiped it off with a paper towel to get the antiquie look that I wanted. With two babies running around, I see that color a lot. (Hehe...I crack myself up. :-D Yes, I'm 12. And a boy.) Let me tell you, those spindle legs are a pain in the neck to get paint on.


See? Pretty. This is the almost finished product. But, like I said, I'm all about the details.


This is what was inside the drawer. Cute, but stained, and not quite cut to the right size, and just didn't match my table's new personality and we don't want a table with multiple personality disorder. Burlap however, matched the personality just perfectly. Have I ever mentioned how much I love burlap? Just in case, I love burlap. I especially love burlap in this instance because I already had some tucked away in my ever-growing fabric stash. Nothin' better than making something new from stuff you already have. Besides, I got to use my nifty rotary cutter to get the perfect fit in the drawer.


I measured the inside of the drawer and cut the burlap out with scissors, but then used the rotary cutter to trim off the little bit of excess at the back of the drawer. I love that thing. Almost as much as I love burlap. Time to put the burlap in. Remember what I said about liking to make things out of stuff I already have? Well, for glue, since I didn't have anything else, I mixed up a quick paste of flour and water.


Anyone who has ever let cookie dough dry in the mixing bowl knows the power of flour and water.


My grand plan was to use my newly aquired rolling pin to press it down in to the drawer. Problem was, it didn't fit.

Fixed that problem. It worked perfectly after a little uh...modification.

All done! See, matching personalities.

Here is the finished product.


Today's Creative Blog