I was planning on revealing William's new bedroom first, but since it's still not finished, I'm gonna jump ahead to Boychild #3's nursery. I'll do my best to point out where I got things, and how I did things as I go through the pictures.
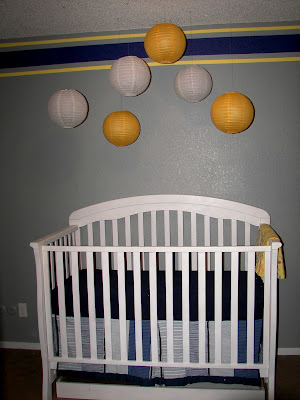
Welcome to Eli's room. This is the view from the door. The paint color is Valspar's Vintage Grey, and I'm pretty much in love with it. It's just deep enough to be manly and soothing without making it feel like the room is closing in on you. To the right, is the crib.
As you can see, I didn't go with a particular theme this time like I did with the other two boys. I decided to just go with good boy colors and then the room can grow with whoever ends up in here without me having to repaint. They can add pictures and things of whatever their current interests are at the time to make it more their own.
The crib I found on Craigslist for a whopping $40, including the mattress. I lucked out on this one not only because of the ridiculously good price, but also because it was almost exactly what I was looking for. The Chinese lanterns I got at Party City for a few bucks each. (The yellow ones are actually more yellow and less orange.)
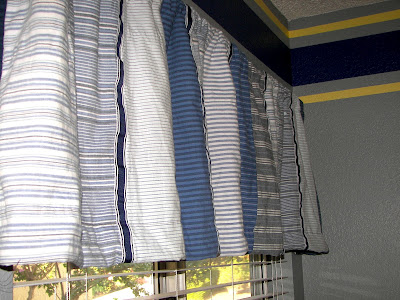
I made the sheets and the crib skirt. I didn't have to buy anything for either. I made two crib sheets out of the top sheet that came with our jersey sheet set for our queen sized bed. We never use flat sheets, so I figured since it was the right color, I may as well put it to good use. The bonus is that it matches the other two kid's rooms too. The crib skirt I made from our old shower curtain that we received when we got married. It had some bleach stains and stuff on it so I'd replaced it in our bathroom, but I kept it around thinking that it was a heck of a lot of fabric that I might be able to use some day.
I was also able to get a matching window valance out of it.

The left side of the room is the closet/changing station. Since the room isn't what anyone would call large, I decided this time around to utilize the double closet that we don't use to put the dresser/changing table in. It also gave me an excuse to do some very boy-like stripes to brighten up the grey a little bit.
The changing pad cover I made out of a towel I found at Kohls. It was the right color, and it was on sale for $3.99. I bought two and made two covers for the price of one of the most inexpensive covers you can buy in a store. The little yellow pacifier bowl I found last week at Target on clearance for $2.50.
The dresser I found on Craigslist for $30. It looked nothing at all like it does now when we brought it home. It used to be white and have a desk attached to it. When I got it into the closet in its original state, the right set of drawers wouldn't open because there was a wall in the way. I could've left it alone and found another place to put it, but I really wanted the extra space that having it in the closet would give me. It took me about a minute to go grab my circular saw and perform a desk amputation. That brought the problem of the molding. There was corner molding around the whole top of it- except for where I'd cut off the desk. Off to Lowe's I went to get some new molding to put around it. I decided to dress it up a little bit and made it a little thicker and more interesting. I ended up with some cheapo door casing topped off with some quarter round at the top. I also picked up some 2x3/8 craft wood to add to the drawer faces to give them a little more dimension. The drawer handles used to be shiny brass, so I grabbed some oil-rubbed bronze spray paint for those. Then came the paint. I had the nice, and very patient, lady in the Lowe's paint department custom mix the paint for it. I told her I wanted the tone of the Vintage Grey, but darker. She worked her magic, and two tries later she gave me the color I had in mind. 4 days later, I had everything mitered, attached, caulked, primed, and painted. It takes awhile to do these things with two little boys running around.
The inside of the drawers I lined with contact paper that I found on sale at Target, and I painted the sides of the drawers with the same yellow paint that's on the walls. The crate came from William's old nursery and I just repainted it the same color as the dresser.
The picture frames I got at the .99 store for, duh, .99 each. The animal silhouettes I printed off the computer and then cut out scrapbook paper that I already had, attached it to card stock that I already had, and stuck those suckers in the frames.
Last but not least is his name. I sprung for the actual wooden letters this time since he's only got 3 letters in his name. William got stuck with cardboard. They're the 13" letters from Hobby Lobby for $2 each that I covered with scrapbook paper. I did have to buy the scrap book paper for these. I bought extra, which was good 'cause I definitely used it, and spent about $3.


I'm very impressed, Hannah! You did a great job. You are quite the handy-woman, and I am inspired by the way you never let a project intimidate you. :-)
ReplyDeleteThis turned out awesome! I'm happy to know you still have time for projects even with two boys running around!
ReplyDeleteGreat job, very manly and adorable for a little boy =) Thanks for linking up to our Pretty Things Party. Hope to see you back next week!
ReplyDelete