
Thursday, June 23, 2011
Blog posts have moved!
Since at this point, I've got more people following me here at The Life of a Housewife that I don't know, rather than those that I do know, I've decided to separate my family and parenting type posts from my creative goings on. For those of you that want to know what's going on with our family, all of those updates can be found here, at my new blog, Raising Kidlets.
Wednesday, June 22, 2011
Mmmm.....Pork

This one I didn't change at all, except for to use olive oil instead of vegetable oil. Just something about vegetable oil that I don't trust.
Ingredients
Directions
Tuesday, June 21, 2011
Favorite Grilled Chicken

Next up in my little grilling series, is (so far) my favorite grilled chicken recipe. This is one of my favorites to grill, because it just smells SO good while it's grilling. If I wouldn't burn my face off, I'd just position my head over the grill so I could just smell it as strongly and for as long as possible. (Or, at least the 14 minutes that it's cooking.) Here is the original recipe, but as usual, I've made a couple changes to it. Here is my version-
Ingredients
Directions
Monday, June 20, 2011
Best. Steak. Ever.

These directions are for one steak, and only include the prepping part of it. Obviously it's easy to alter if you're doing more than one.
1 ribeye steak, close to 1lb
1 1/2 tsp Lawry's seasoning salt
1/4 tsp ground pepper
1/4 tsp cayenne pepper
4 tbls extra virgin olive oil (2 tbls for each side of the steak)
At least an hour before grilling....
-Pierce steak several times with fork or knife.
-Coat steak with 2 tbls olive oil.
-In a small bowl stir together seasoning salt, ground pepper, and cayenne.
-Coat steak with half of the seasoning mixture.
-Let sit at least 15 min
-Turn steak over and repeat all steps.
-If putting into fridge to marinate, remove from fridge an hour before grilling to bring steak temperature down to room temperature.
Happy grilling!
Friday, June 17, 2011
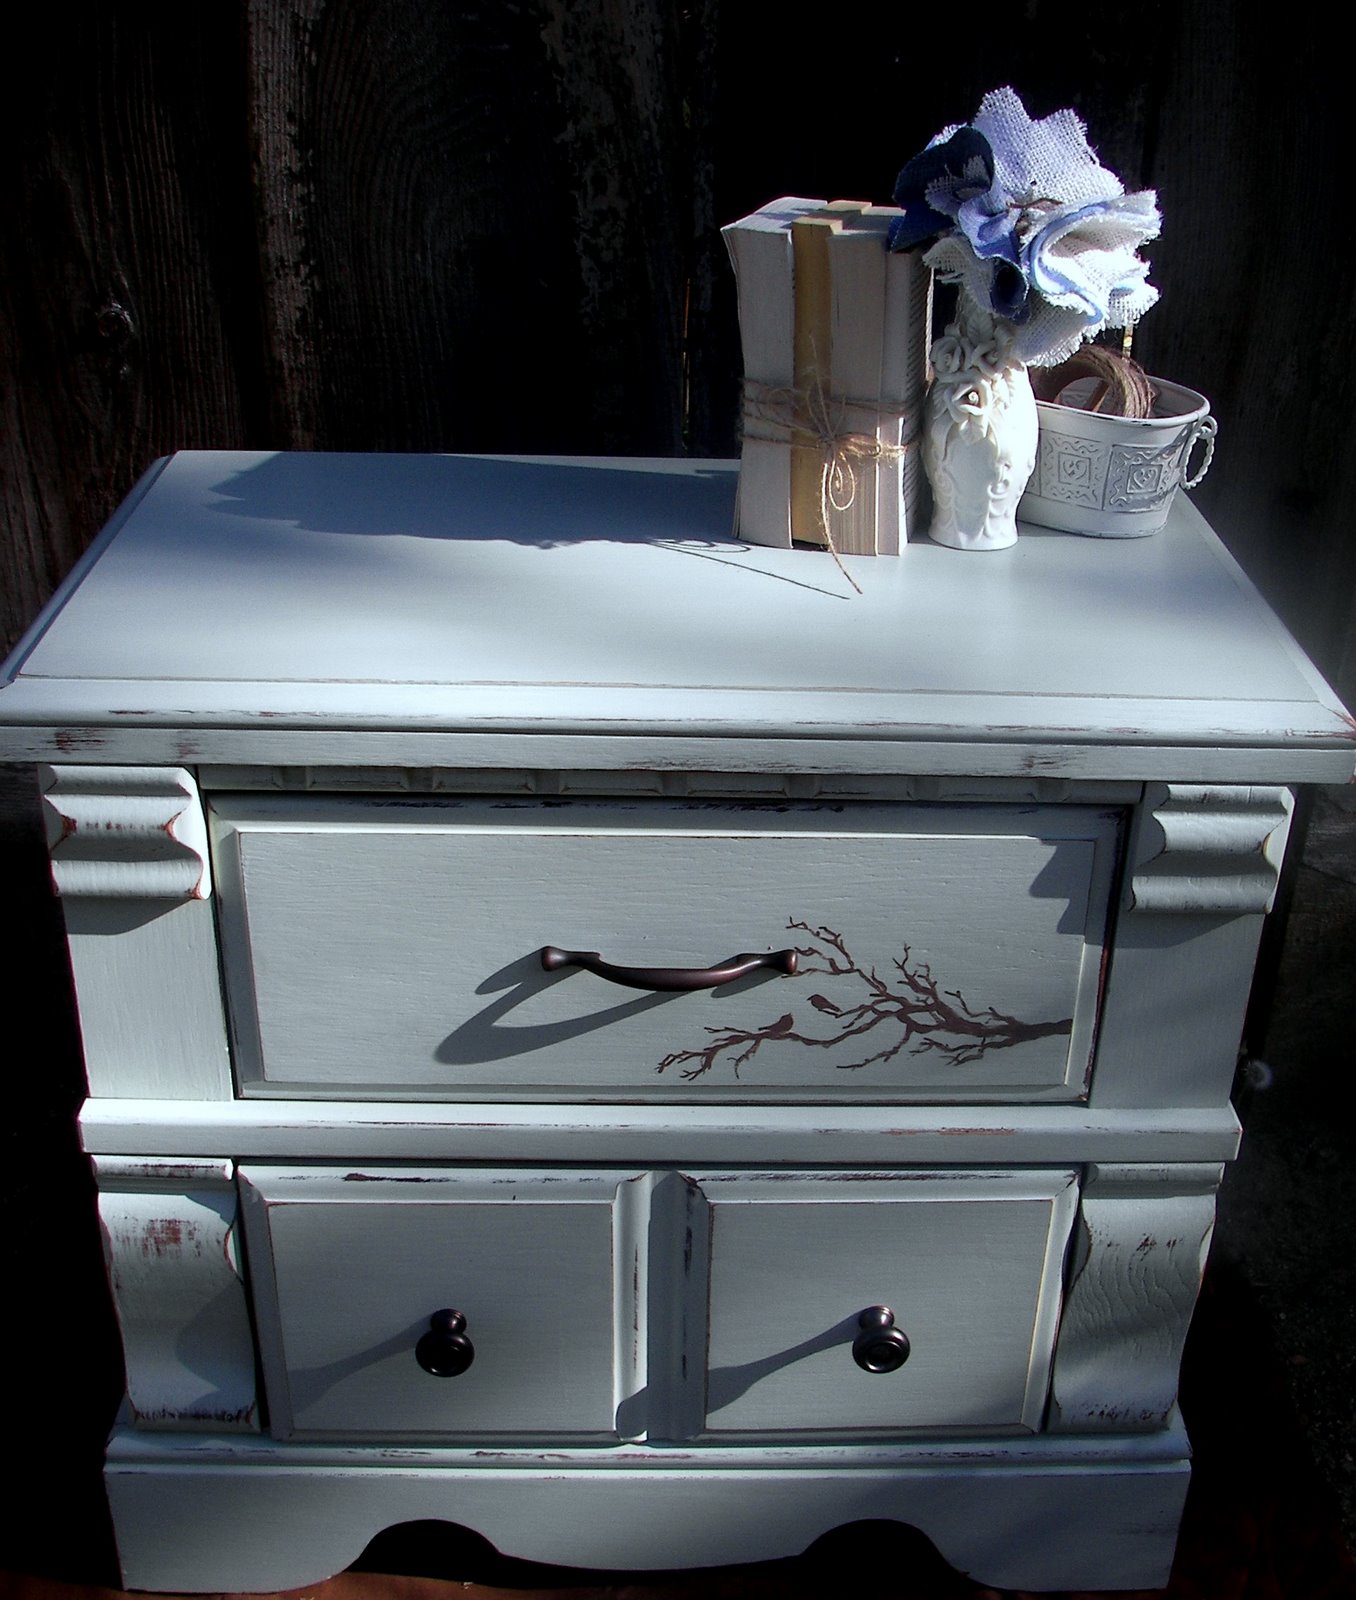
Before and After

This is the end table I mentioned way back here. I really thought I would have it done before now. Guess I was wrong. Woops. Anyways, it's been painted, received a "something pretty," distressed, and polyurethaned. That's a word, right? Eh, probably not. Here's the after.


Tuesday, June 14, 2011
Pancakes for lunch!

Yesterday I had a bad experience with lunch meat, so I was looking for something relatively quick and easy to make for lunch for Noah and me, since lunch meat was out. Pancakes is what I decided on. It's been awhile since I've made them, but I thought I'd share my "go-to" pancake recipe. I've done these with so many different additives....blueberries, of course, chocolate chips, chocolate chips AND peanut butter chips, and last fall I added cinnamon, nutmeg, and cloves for fall-like pancakes. I plan on adding pumpkin at some point too, but haven't done that one yet. They're thick and yummy. I don't even bother ordering pancakes in restaurants when I have the option, because these are better. Anyways, here's the recipe, with my changes in italics.
Ingredients
Directions
I realize the whole vinegar and milk thing sounds disgusting...and looks and smells disgusting, but it all works out in the end. Enjoy!
Tuesday, June 7, 2011
The blender is my friend
Recently I discovered a cooking trick, that I thought I'd share. During the summer, we do a whole lotta cooking on the grill, which means a whole lot of marinating. My favorite way to marinate is to do it in a zip lock bag since that equals no cleanup for me after dinner. Since Zip Lock backs don't exactly have a bottom to them, dumping stuff into them is a little bit of a challenge- until I discovered this. Take the blades out of the bottom of your blender, and stick the bag in that. Tada! No more challenge. Just dump, zip, and stick in the fridge.

Monday, June 6, 2011
A small before and after

This is a little metal tub thingy I found for a few cents at The Salvation Army that needed a little bit of a makeover. I liked it as it was, or really, as they were, since there were 3 of them, but as usual, I thought they could be better. Enter Rustolium's Heirloom White spray paint.

Better, right? Still not done though. Distressing makes everything better.

NOW it's all done. Slightly distressed to bring out the details, and give it a little personality.
Subscribe to:
Posts (Atom)